Anyway, I built a trebuchet over the past two weekends using plans from Issue 25 of Make. Let's see how that worked out.
I started by getting the nice folks at Home Depot to cut up a 4x8' sheet of plywood according to the plan spec. When I got them home, I laid out the base and attached the cross pieces to make it more rigid.


Next, we added hinges. This is a fold-and-store trebuchet - it'll fit in your closet!


The uprights are attached to the base with strap hinges - the hinges are not what holds them in place, though. At the top of each upright, screw-eyes are inserted to act as anchor points for guy wires.
How to make a guy wire
Get a length of 1/8" galvanized wire rope. Use matching wire clamps to make loops at each end. When you mount the guy wire, put a turnbuckle at one end (I used 1/4" by 5" turnbuckles) to properly tension. This is easiest if you read the preceding sentences and execute them backwards like a Tarantino movie.
What? I mean fully extend your turnbuckle and use that length to measure how long your cable should be. This means you'll have a few inches of give in tensioning.
Attach yer Flanges!
The uprights get flanges, and the counterpoise deck gets flanges. Check underneath your chair. You guy a flange! Everybody gets a flange!
The end result of all that looks something like this.

The throwing arm needs two holes, the cross needs a hole, and the end cap needs a hole. Drag your drill press out of its corner. If you don't have a drill press, don't try this at home.

You'll bolt some screw eyes through these holes, and tension another guy wire along them. I assume this helps keep the throwing arm from bending or breaking under stress - it's never properly explained.
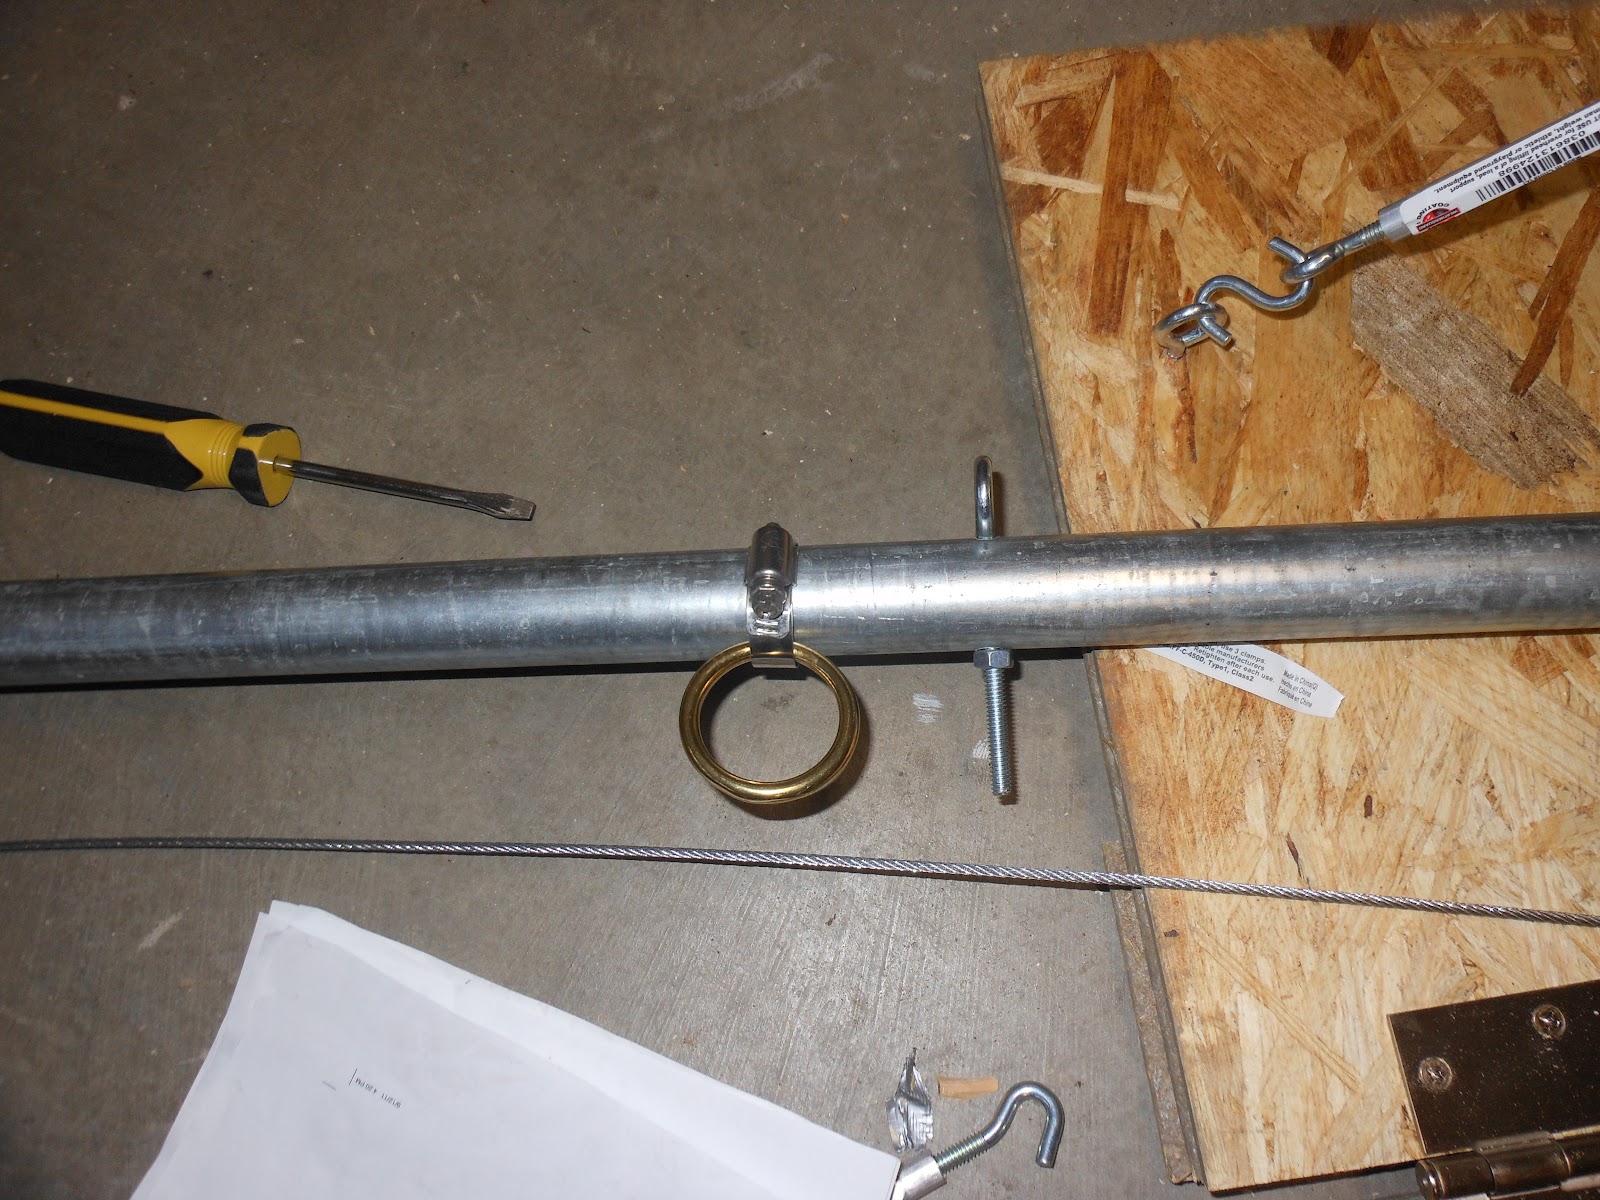
Anyway, you'll also need a ring to hold down the throwing arm when preparing for launch. Use a 2" hose clamp for this.


Also - my panic snap didn't want to release very easily, so we devised a two-part trigger. On one side, someone pulls a nylon string to open the snap - this is the "safety". The snap stays caught on its lip until a person standing on the other side gives a solid yank from the other direction to pull the snap off the ring.

and...
As you can see, we had a little bit of trouble with the counterweight on that last go-round. I'll be switching to big ol' bags of cement next time.
This comment has been removed by the author.
ReplyDeleteWell, that was silly of me. Didn't mean to delete the comment. I say that drill press needs a cover. Let's lob lobsters!
ReplyDeletequite impressive. i'm going to build one and then go invade some French castles! this is definitely a spring-time project for me and the kid. -tyh
ReplyDelete